How to setup PayPal Standard on YouTube
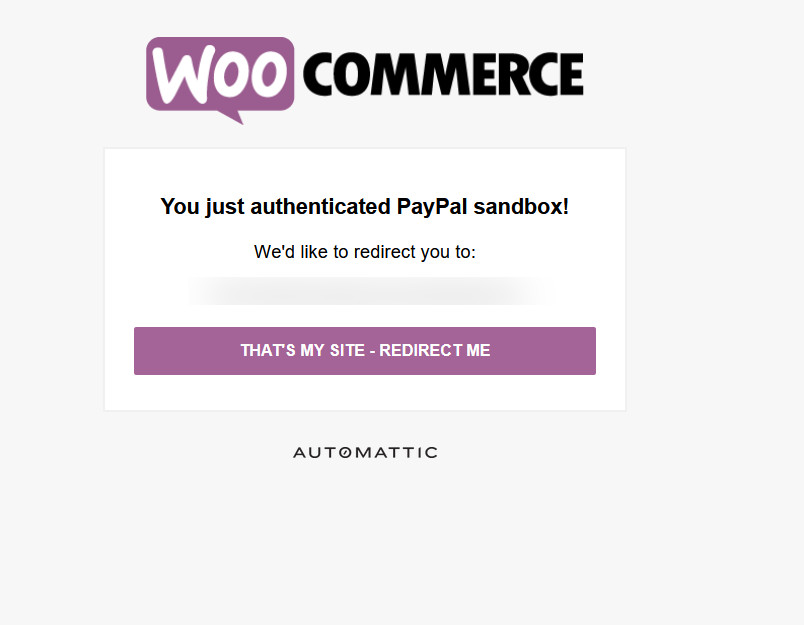
To connect your account, follow the full onboarding guide or the steps below: Log in to your WordPress admin dashboard and go to WooCommerce > Settings. Click the Payments tab. Click Set Up (or Manage if the extension is already active) next to PayPal. Click the Test payments with PayPal sandbox button to connect your sandbox PayPal account.
PayPal Setup An AllinOne Guide (2020)
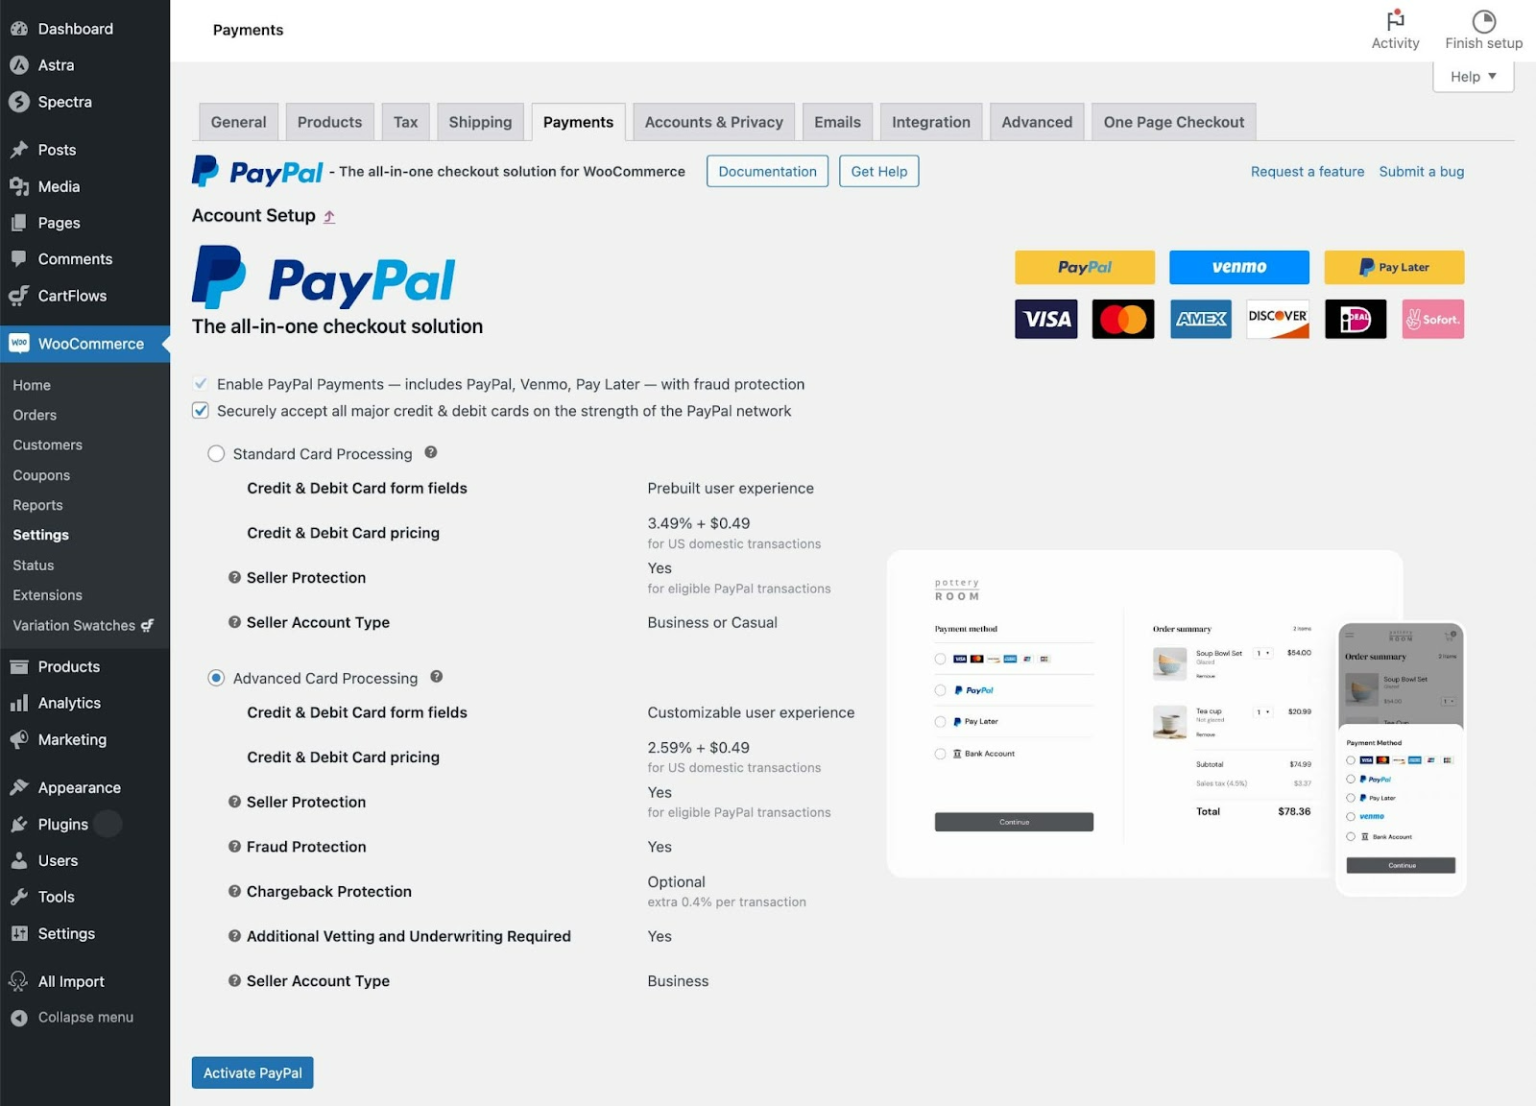
WooCommerce PayPal Payments is a full-stack solution that offers powerful and flexible payment processing capabilities. Set up quickly. Enable payment acceptance easily. Offer your customers a seamless checkout experience and get paid quickly. WooCommerce PayPal Payments is the only payments extension that includes PayPal, Pay Later, Vaulting, advanced credit and debit card processing, and.
How to Setup Paypal with Clickittech
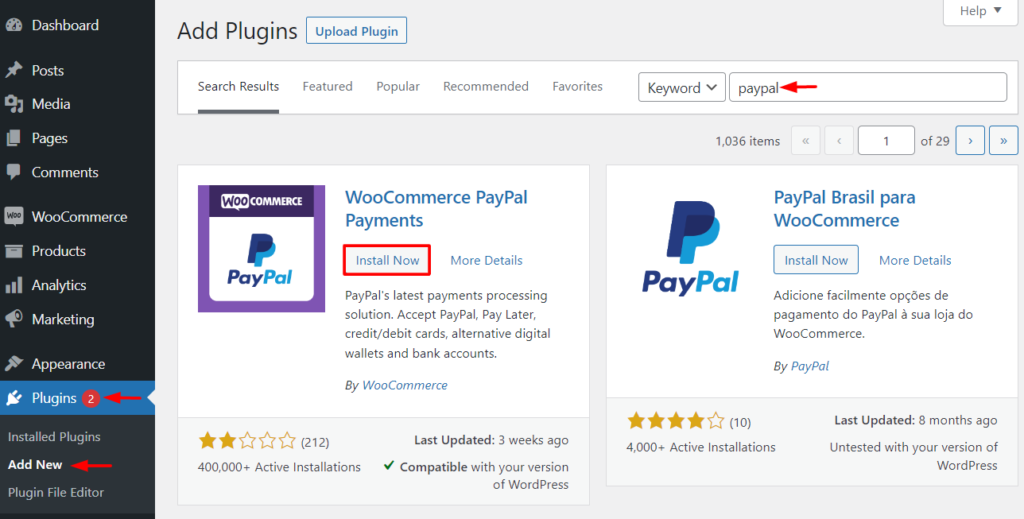
Step 2: Installing and Activating Paddle for WooCommerce Plugin. Access your WordPress dashboard and navigate to the "Plugins" section. Click "Add New" and upload the "Paddle for WooCommerce" plugin. Ensure you've downloaded it beforehand. Click "Install Now" and activate the plugin after installation.

How to Setup PayPal Payments with YouTube
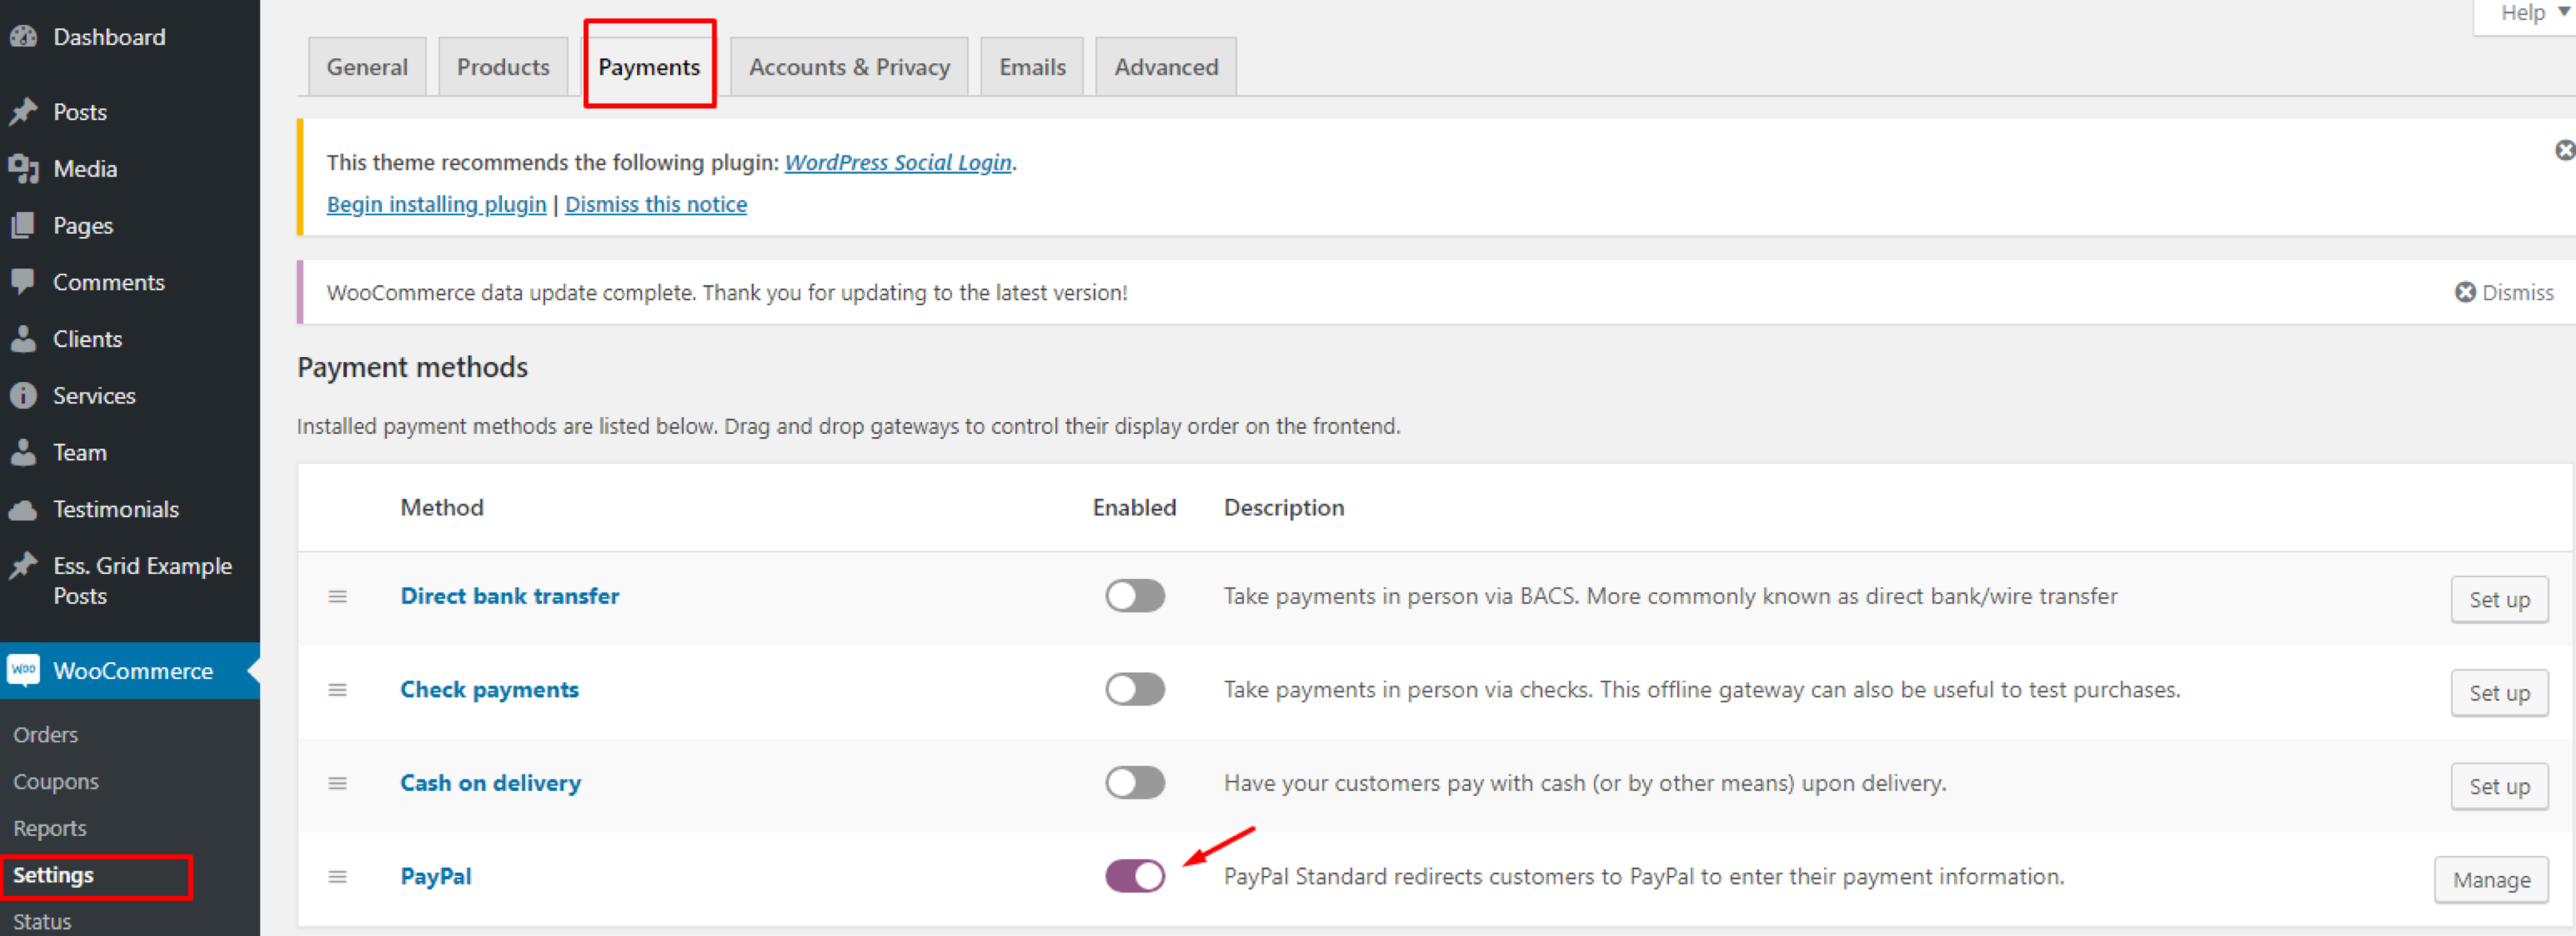
Step 1: Navigate to WooCommerce > Settings > Payments from your WordPress dashboard. Click the Manage button across PayPal standard. It will open a new page with options to configure.
PayPal Setup An AllinOne Guide (2020)
WooCommerce Paypal setup is not the easiest to follow. Take a look at the official PayPal WooCommerce setup guide before getting started. WooCommerce PayPal Express, also known as PayPal Express checkout for WooCommerce that auto-populated the customer's address at checkout still exists. But the name is officially gone.
How to setup PayPal Express Checkout in
Top-Rated & Free eCommerce Website Builders 2024. Start Now! Best Free eCommerce Website Builders in Comparison. Check it Out!
PayPal checkout integration Extension and Setup
PayPal for WooCommerce Installation Guide. 1. Install the PayPal for WooCommerce plugin. Now What? 2. Follow our Setup Guide. The PayPal Complete Payments gateway is the latest-and-greatest product stack that PayPal provides. This is the recommended gateway to configure on your website for the vast majority of sellers.
PayPal setup How to set up PayPal payments
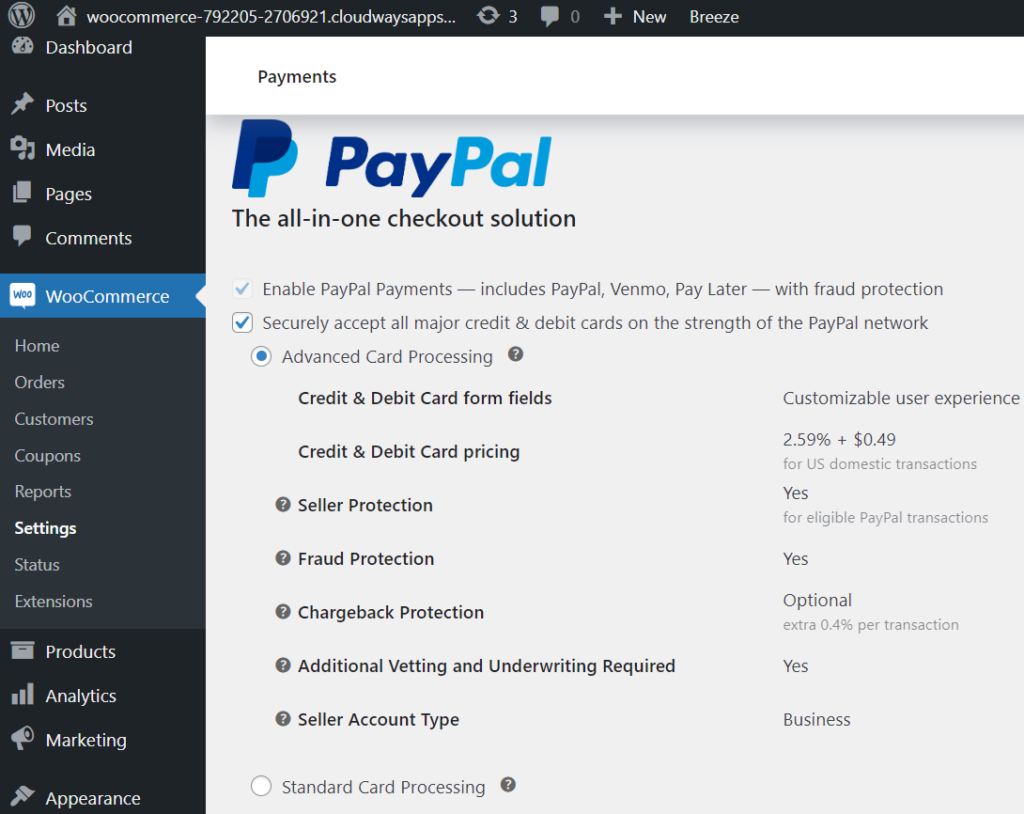
WooCommerce PayPal Payments lets you offer PayPal, Venmo (US only), Pay Later options,. You can also use fraud protection tools to set up your own risk tolerance filters. Offer Subscription payments to help drive repeat business. Create stable, predictable income by offering subscription plans. WooCommerce PayPal Payments is compatible with.
PayPal setup How to set up PayPal payments
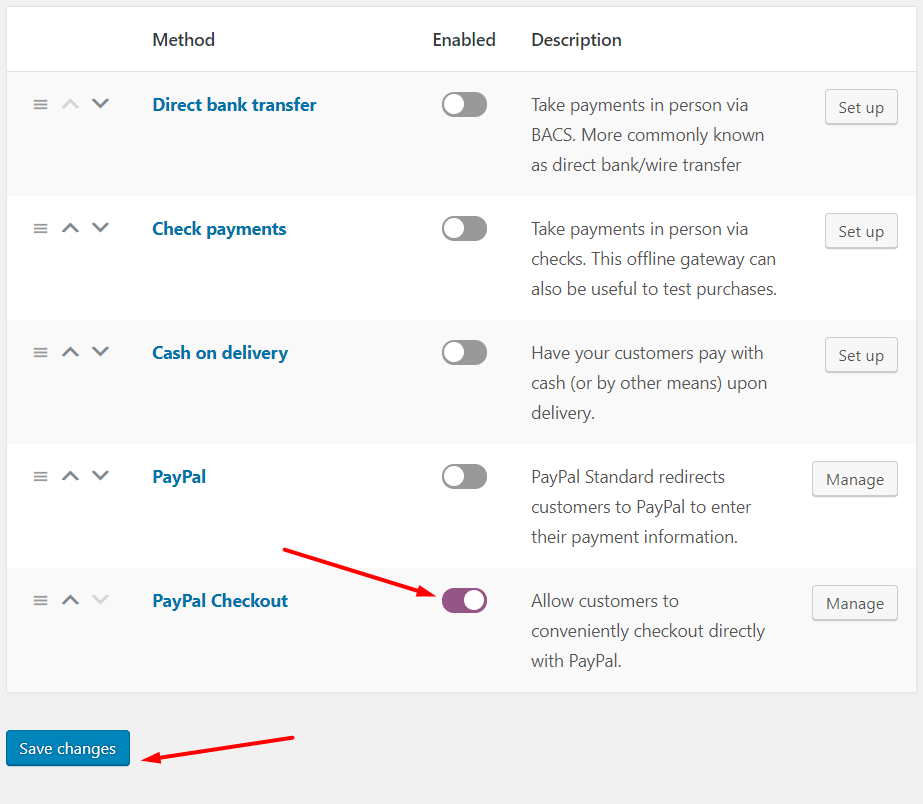
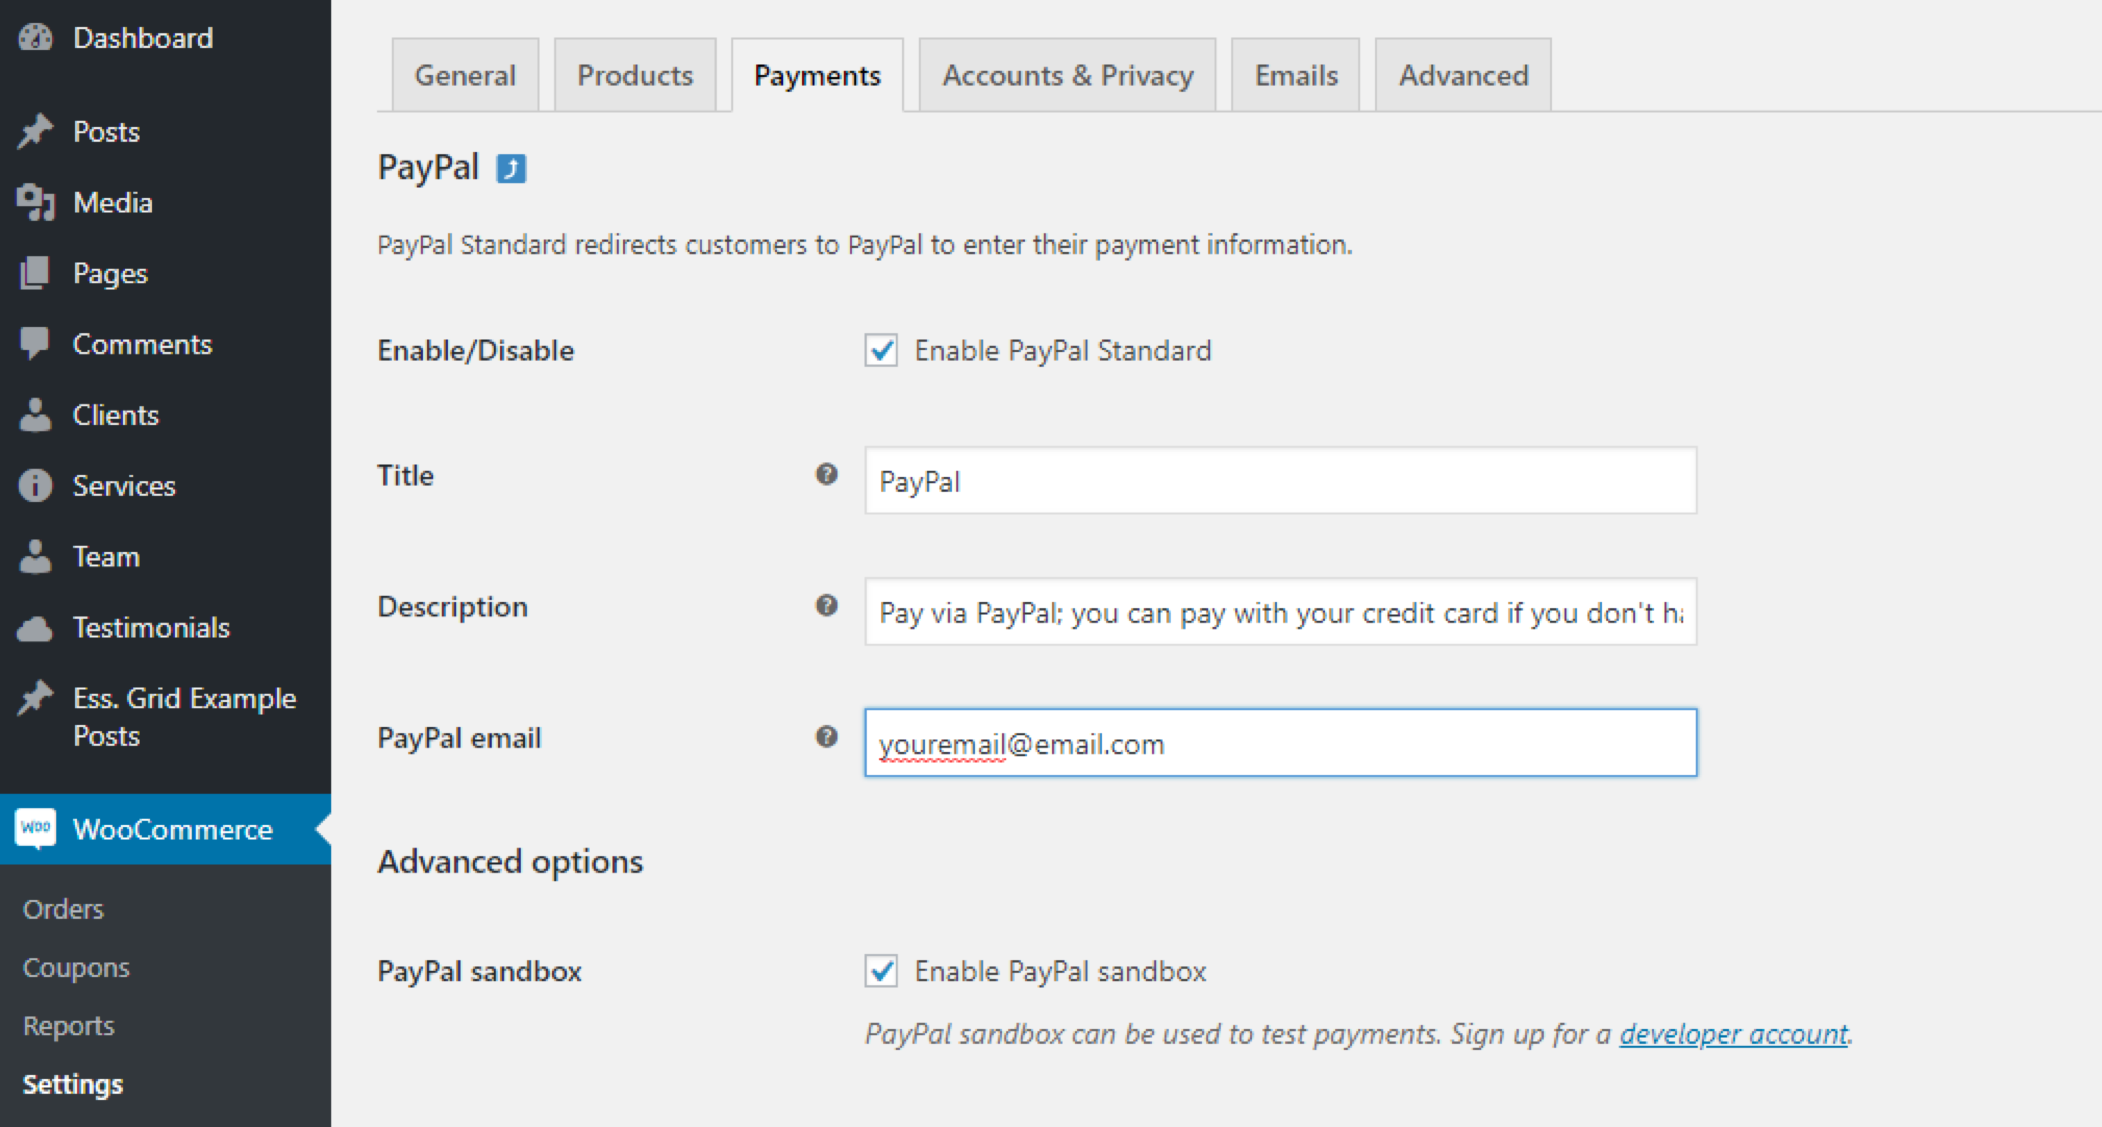
To set up PayPal Standard: 1/ Go to: WooCommerce > Settings > Payments. 2/ Use the toggle under Enabled to select PayPal. 3/ Select Set up. You are taken to the PayPal Standard settings. 4/ Enter your email address in the PayPal Email field, which is the most important thing to configure before taking payments. Must match the same email address.
How to Setup Paypal with Clickittech
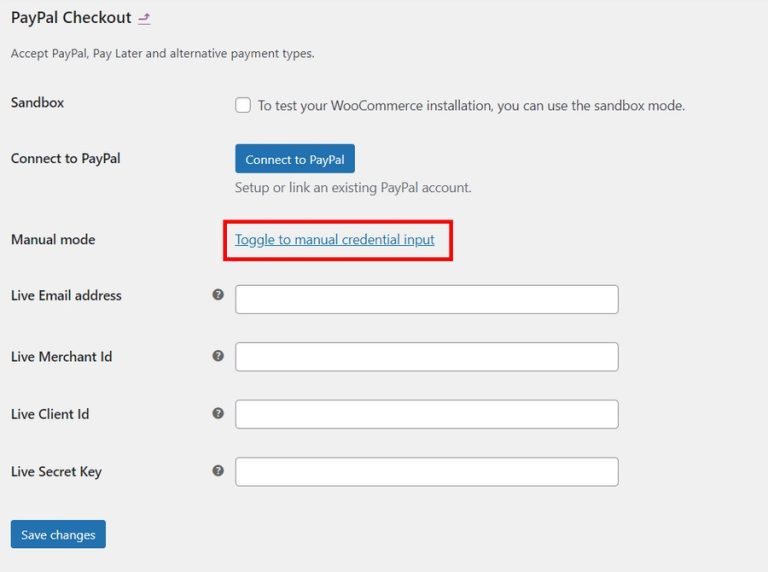
After activating, go to WooCommerce > Settings > Payments. You will see the PayPal payment method added to the list of available options. Toggle the switch to turn on the PayPal payment method and save your changes. On the next page, you will see two options for connecting to PayPal: automatic and manual.
How to Setup Paypal with Clickittech
Step-by -step WooCommerce Paypal setup. 1. Go to WooCommerce setting on WordPress. 2. First we have to enable PayPal payment method on WooCommerce Plugin. Click on Checkout Tab > PayPal Tab > PayPal > Enable PayPal Standard. After enabling PayPal option fill the required information. 3. PayPal Sandbox.
How To Setup PayPal Express Checkout WebToffee
Learn how to set up PayPal Payments on WooCommerce.👉 WooCommerce PayPal Payments: https://sgwp.dev/paypal-- PLUGIN LINKS --WooCommerce PayPal Payments: http.
How to set up and integrate with PayPal Checkout
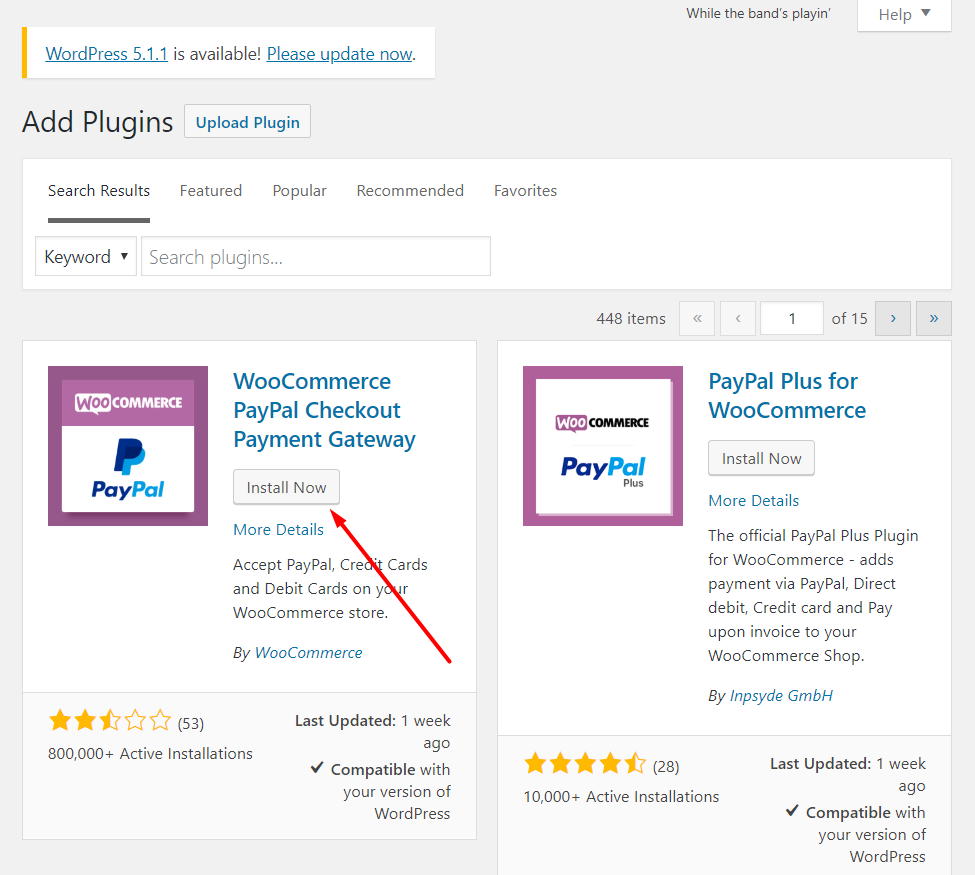
Install the WooCommerce PayPal Payments plugin: Hover over the Plugins tab on the left sidebar and click Add New. Search for the plugin and click Install and Activate. Connect to PayPal: You can now connect to your PayPal business account. You're now all done and ready to go.
PayPal checkout integration Extension and Setup
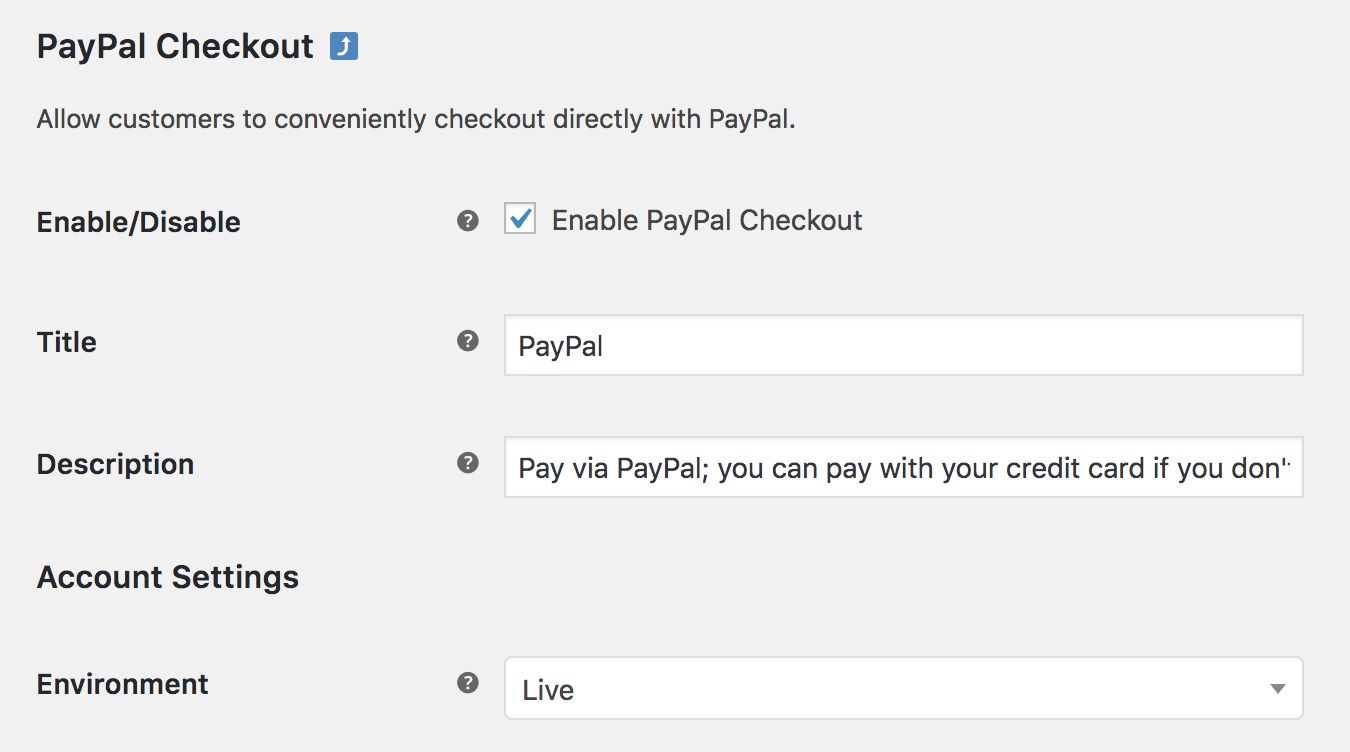
Setup and Configuration. To set up PayPal Checkout: Go to WooCommerce > Settings > Payments. Use the toggle next to PayPal Checkout to Enable it. Click Set up or Manage to configure your PayPal Checkout settings. Configure your settings: Title - Choose the title shown to customers during checkout.

How to Setup PayPal Payment Gateway on
To setup, the PayPal payment gateway first you need to have a PayPal Business account. If you don't have a business account create one first. If you already have a PayPal Personal account you can convert it into a Business account. Setting Up WooCommerce PayPal Standard Payments. This setup has to be done in 2 parts; the 1st part is done from.
PayPal Checkout
Go to your WordPress dashboard and click " Plugins " in the left sidebar. Click " Add New " and type " WooCommerce PayPal Payments " in the search box. Find the plugin and click " Install Now .". Once installed, click " Activate " to activate the plugin. Navigate to WooCommerce > Settings > Payments.